Design Decisions
A laptop or tablet stand to hold it upright or in some useful position
Must be cut from not more than two sheets of 18 x 24" flute and/or two sheets of chipboard
Does not use fastening materials to assemble and use product
Must be able to be dissembled into pieces that can be stored flat and transported
No downloaded designs as the structure and design must be of your own conception
What I implemented:
A base large enough to hold a laptop as well as at around a 15 degree angle, to provide height for the screen as well as an ergonomic wrist angle
Used one sheet of flute
Created slits on each part that slide together
Slits allowing easy disassembly and reassembly
Designed a three piece prototype from scratch
Sketches
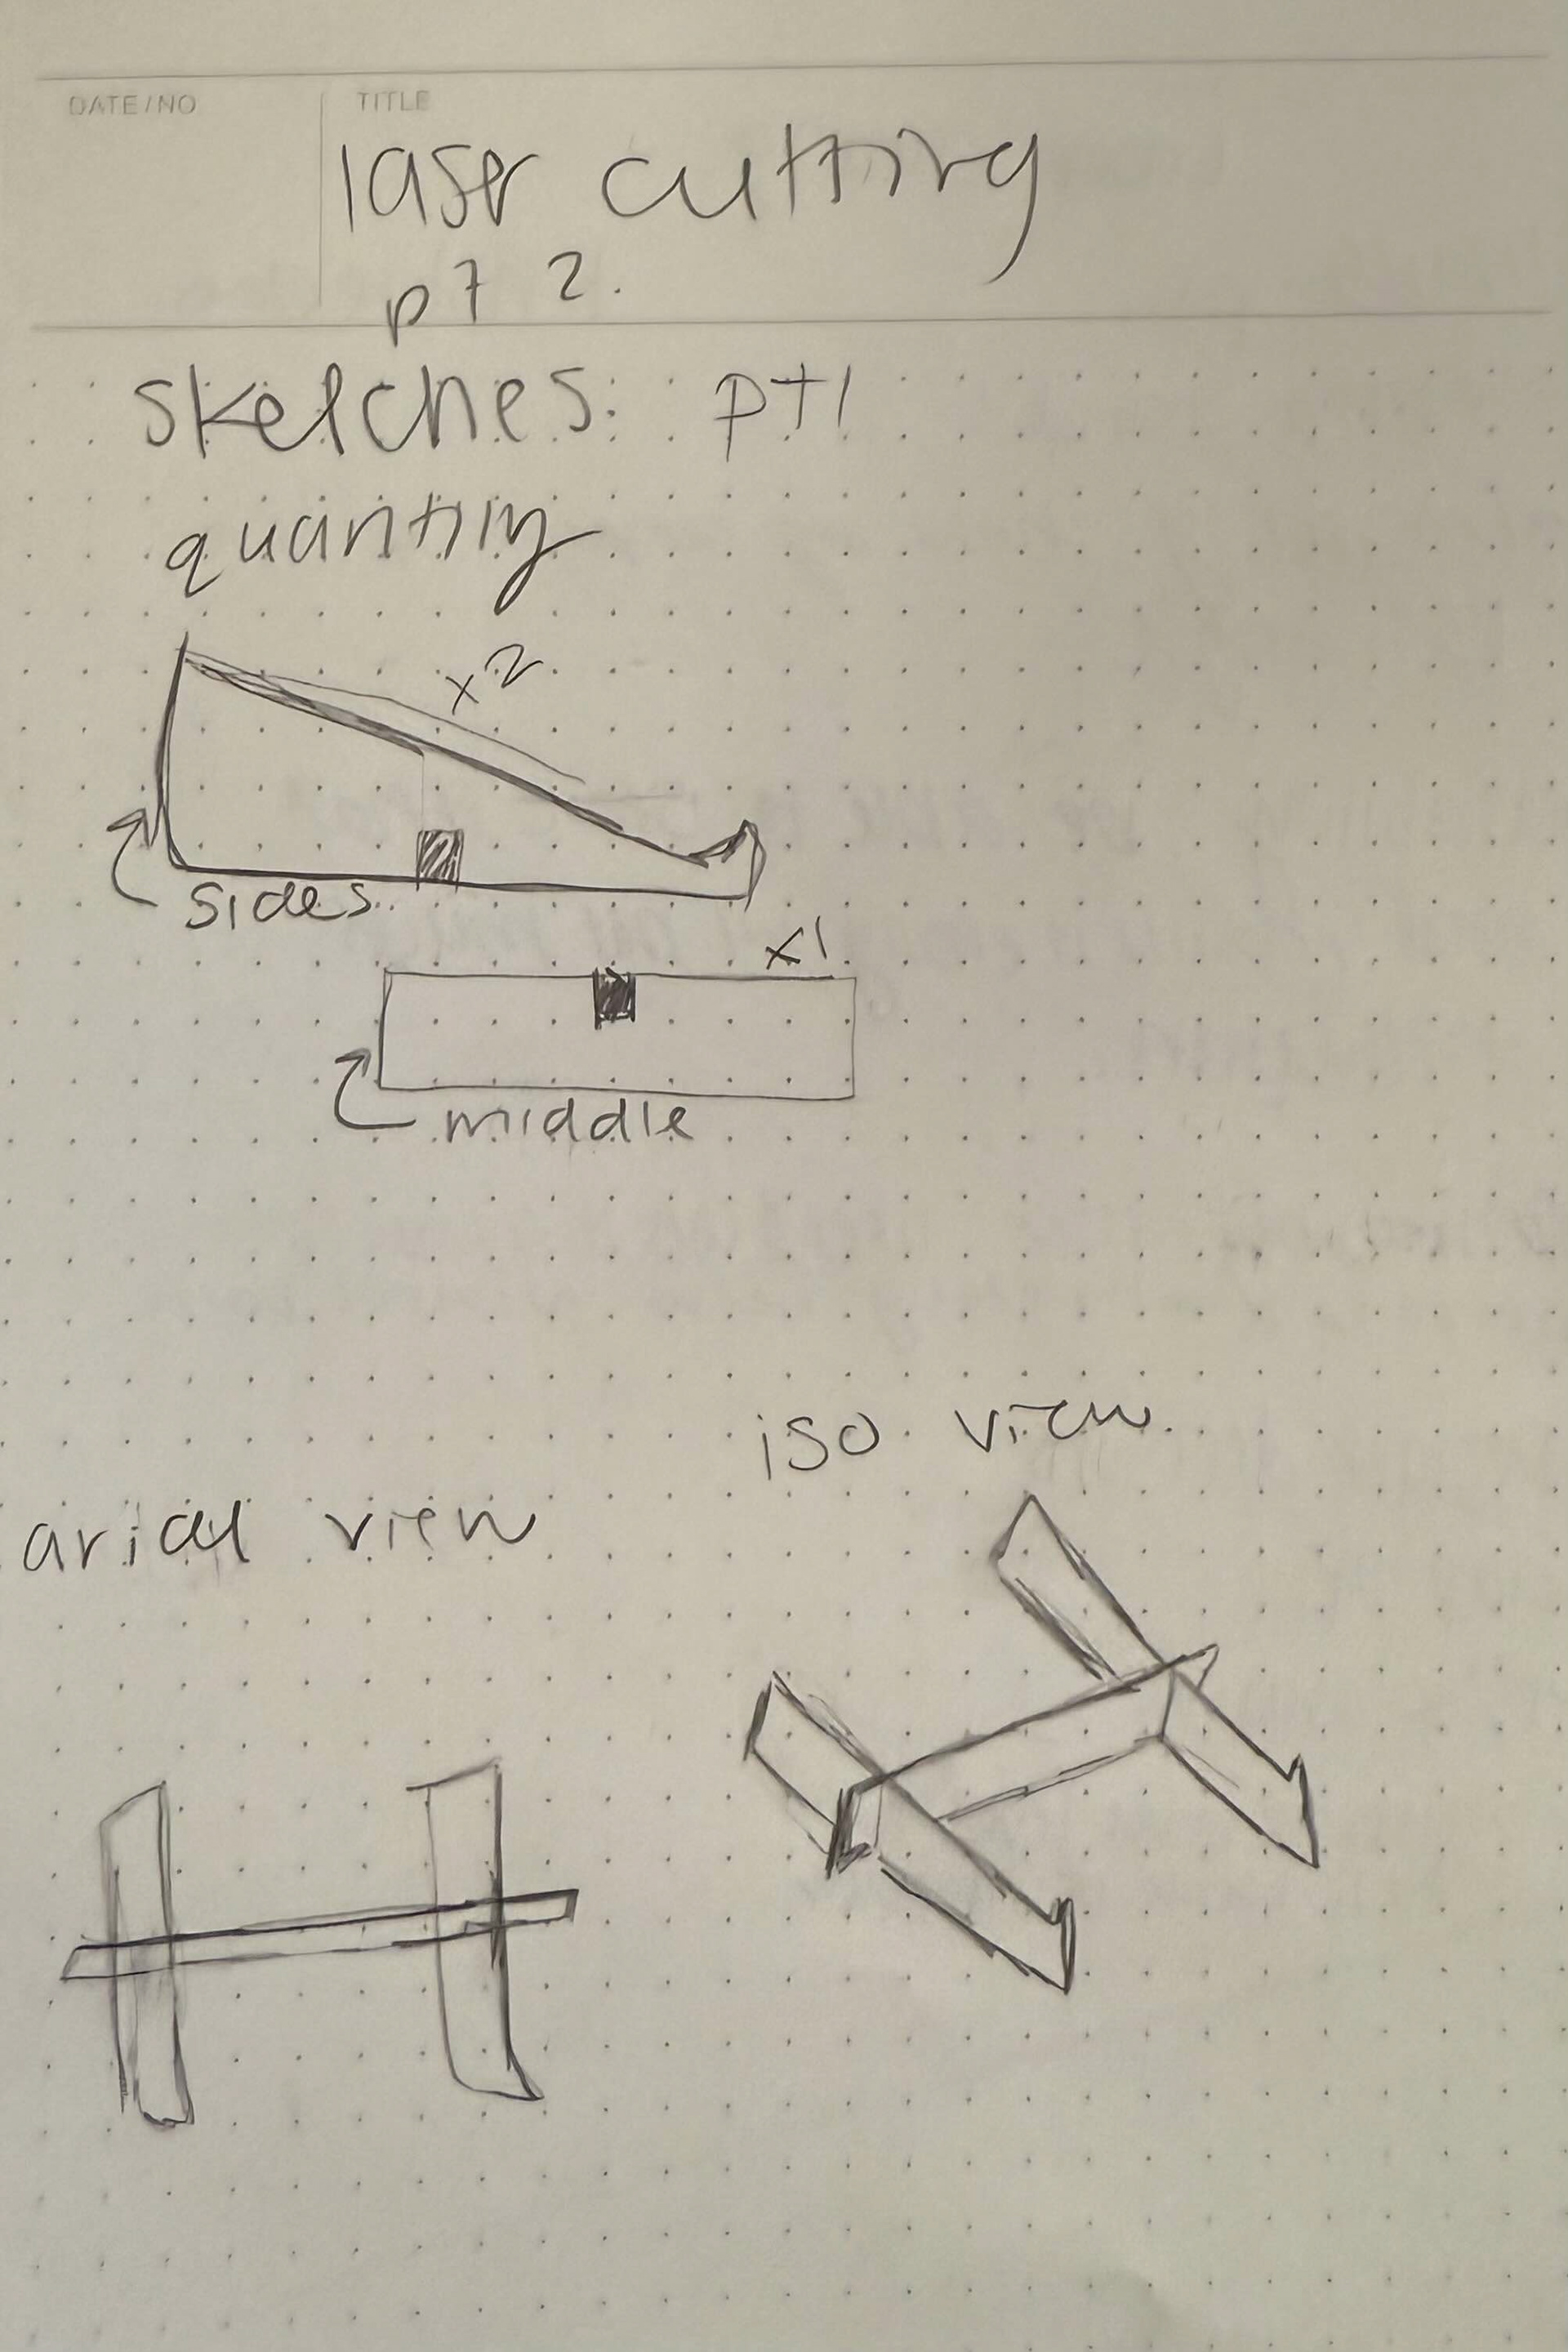
Initial Sketch for Shape and Design

Initial Sketch Dimensions and Details
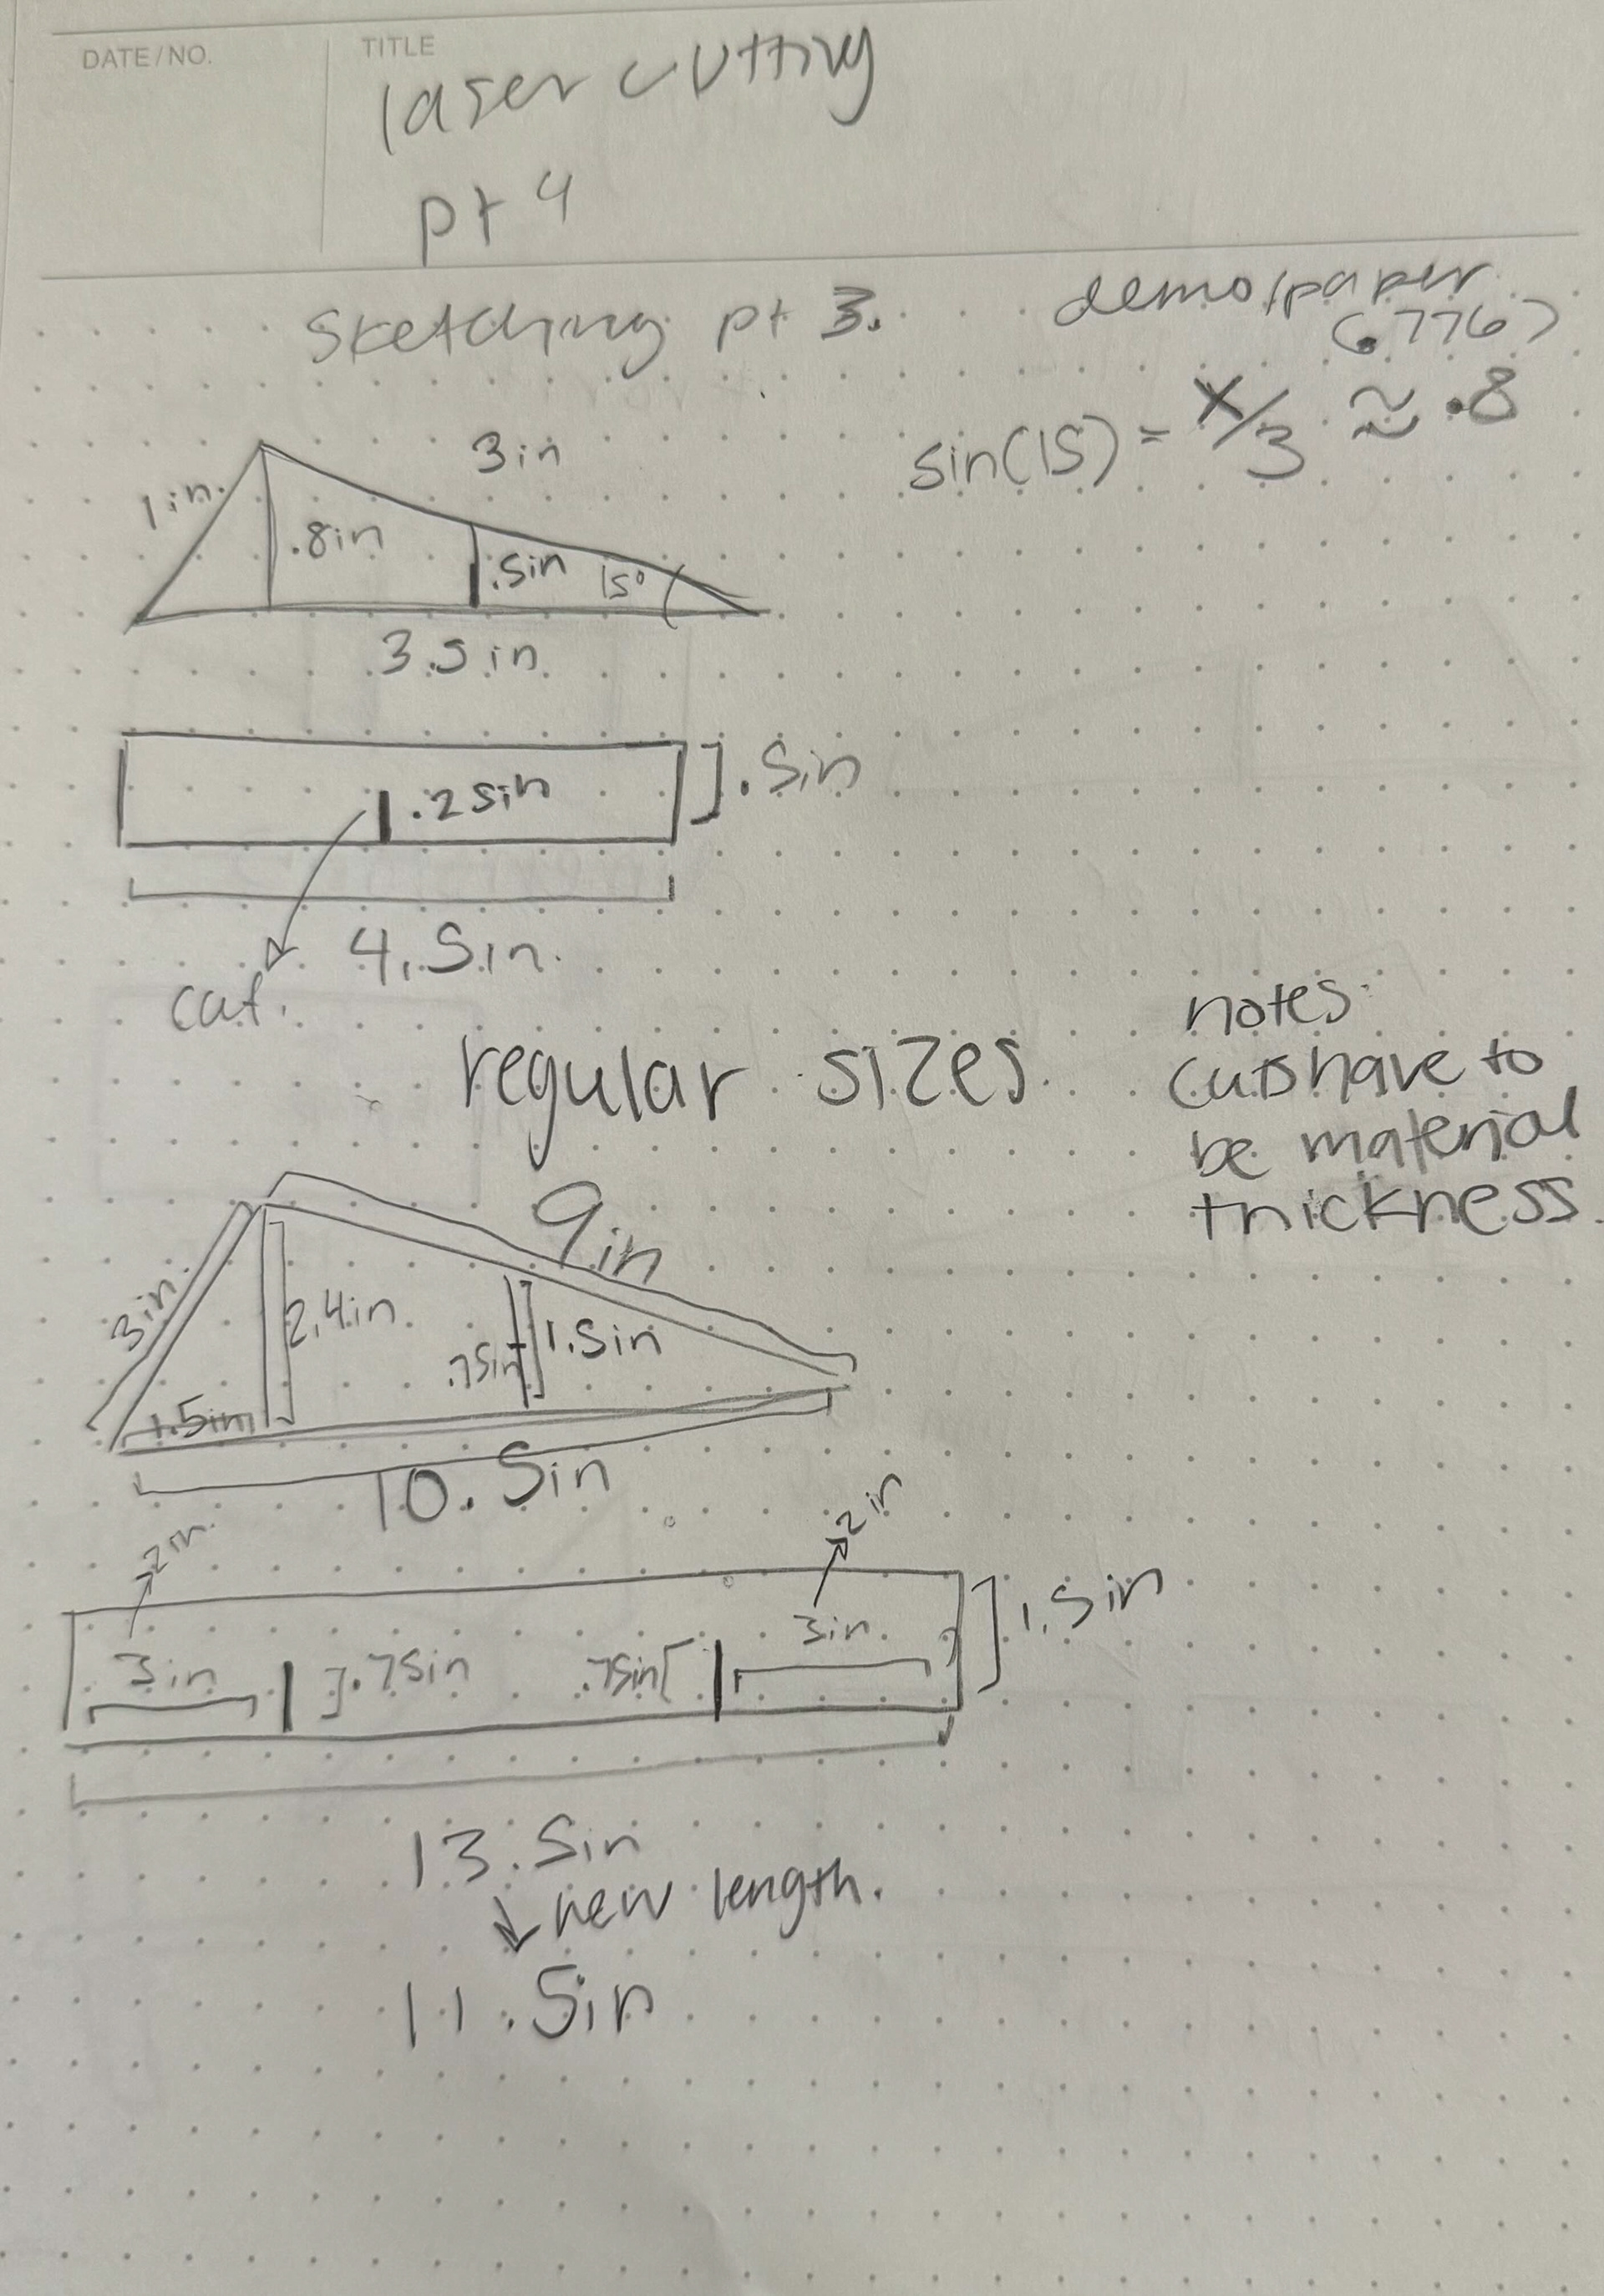
Iterated Design Change and Dimensions
Prototype
In the paper iteration I made initially, I scaled the size down to be 1/3 of the actual size to see if the concept of the design was functional. When I made the prototype, I found the angle it was at was good and the prototype had structure, so it would not fall when trying to support a laptop. With these measurements scaled up, I started measuring it out on some scrap cardboard I had.
In the hand-cut iteration, I found that the slits had to be wider since the cardboard could not be put together with a simple cut. I decided the slits had to be as thick as the material being used so there would be a snug fit between the pieces.
When moving on to the first iteration of using the laser cutter, my flute caught on fire. My file had lines stacked on top of each other, therefore when the program was reading over and laser cutting, it would go over certain areas again, causing the flute to catch a little flame. I had to stop the print, edit the file and remove the overlapping lines and reprint the design. I also had issues with Adobe Illustrator, where the application stopped responding while I tried to make design changes, so I had to stick to the initial design choices of having pointy corners.
The final iteration holds up my laptop up well and is sturdy. The angle is very ergonomic for my wrist and helps alleviate wrist pain that I get with prolonged usage of my laptop.
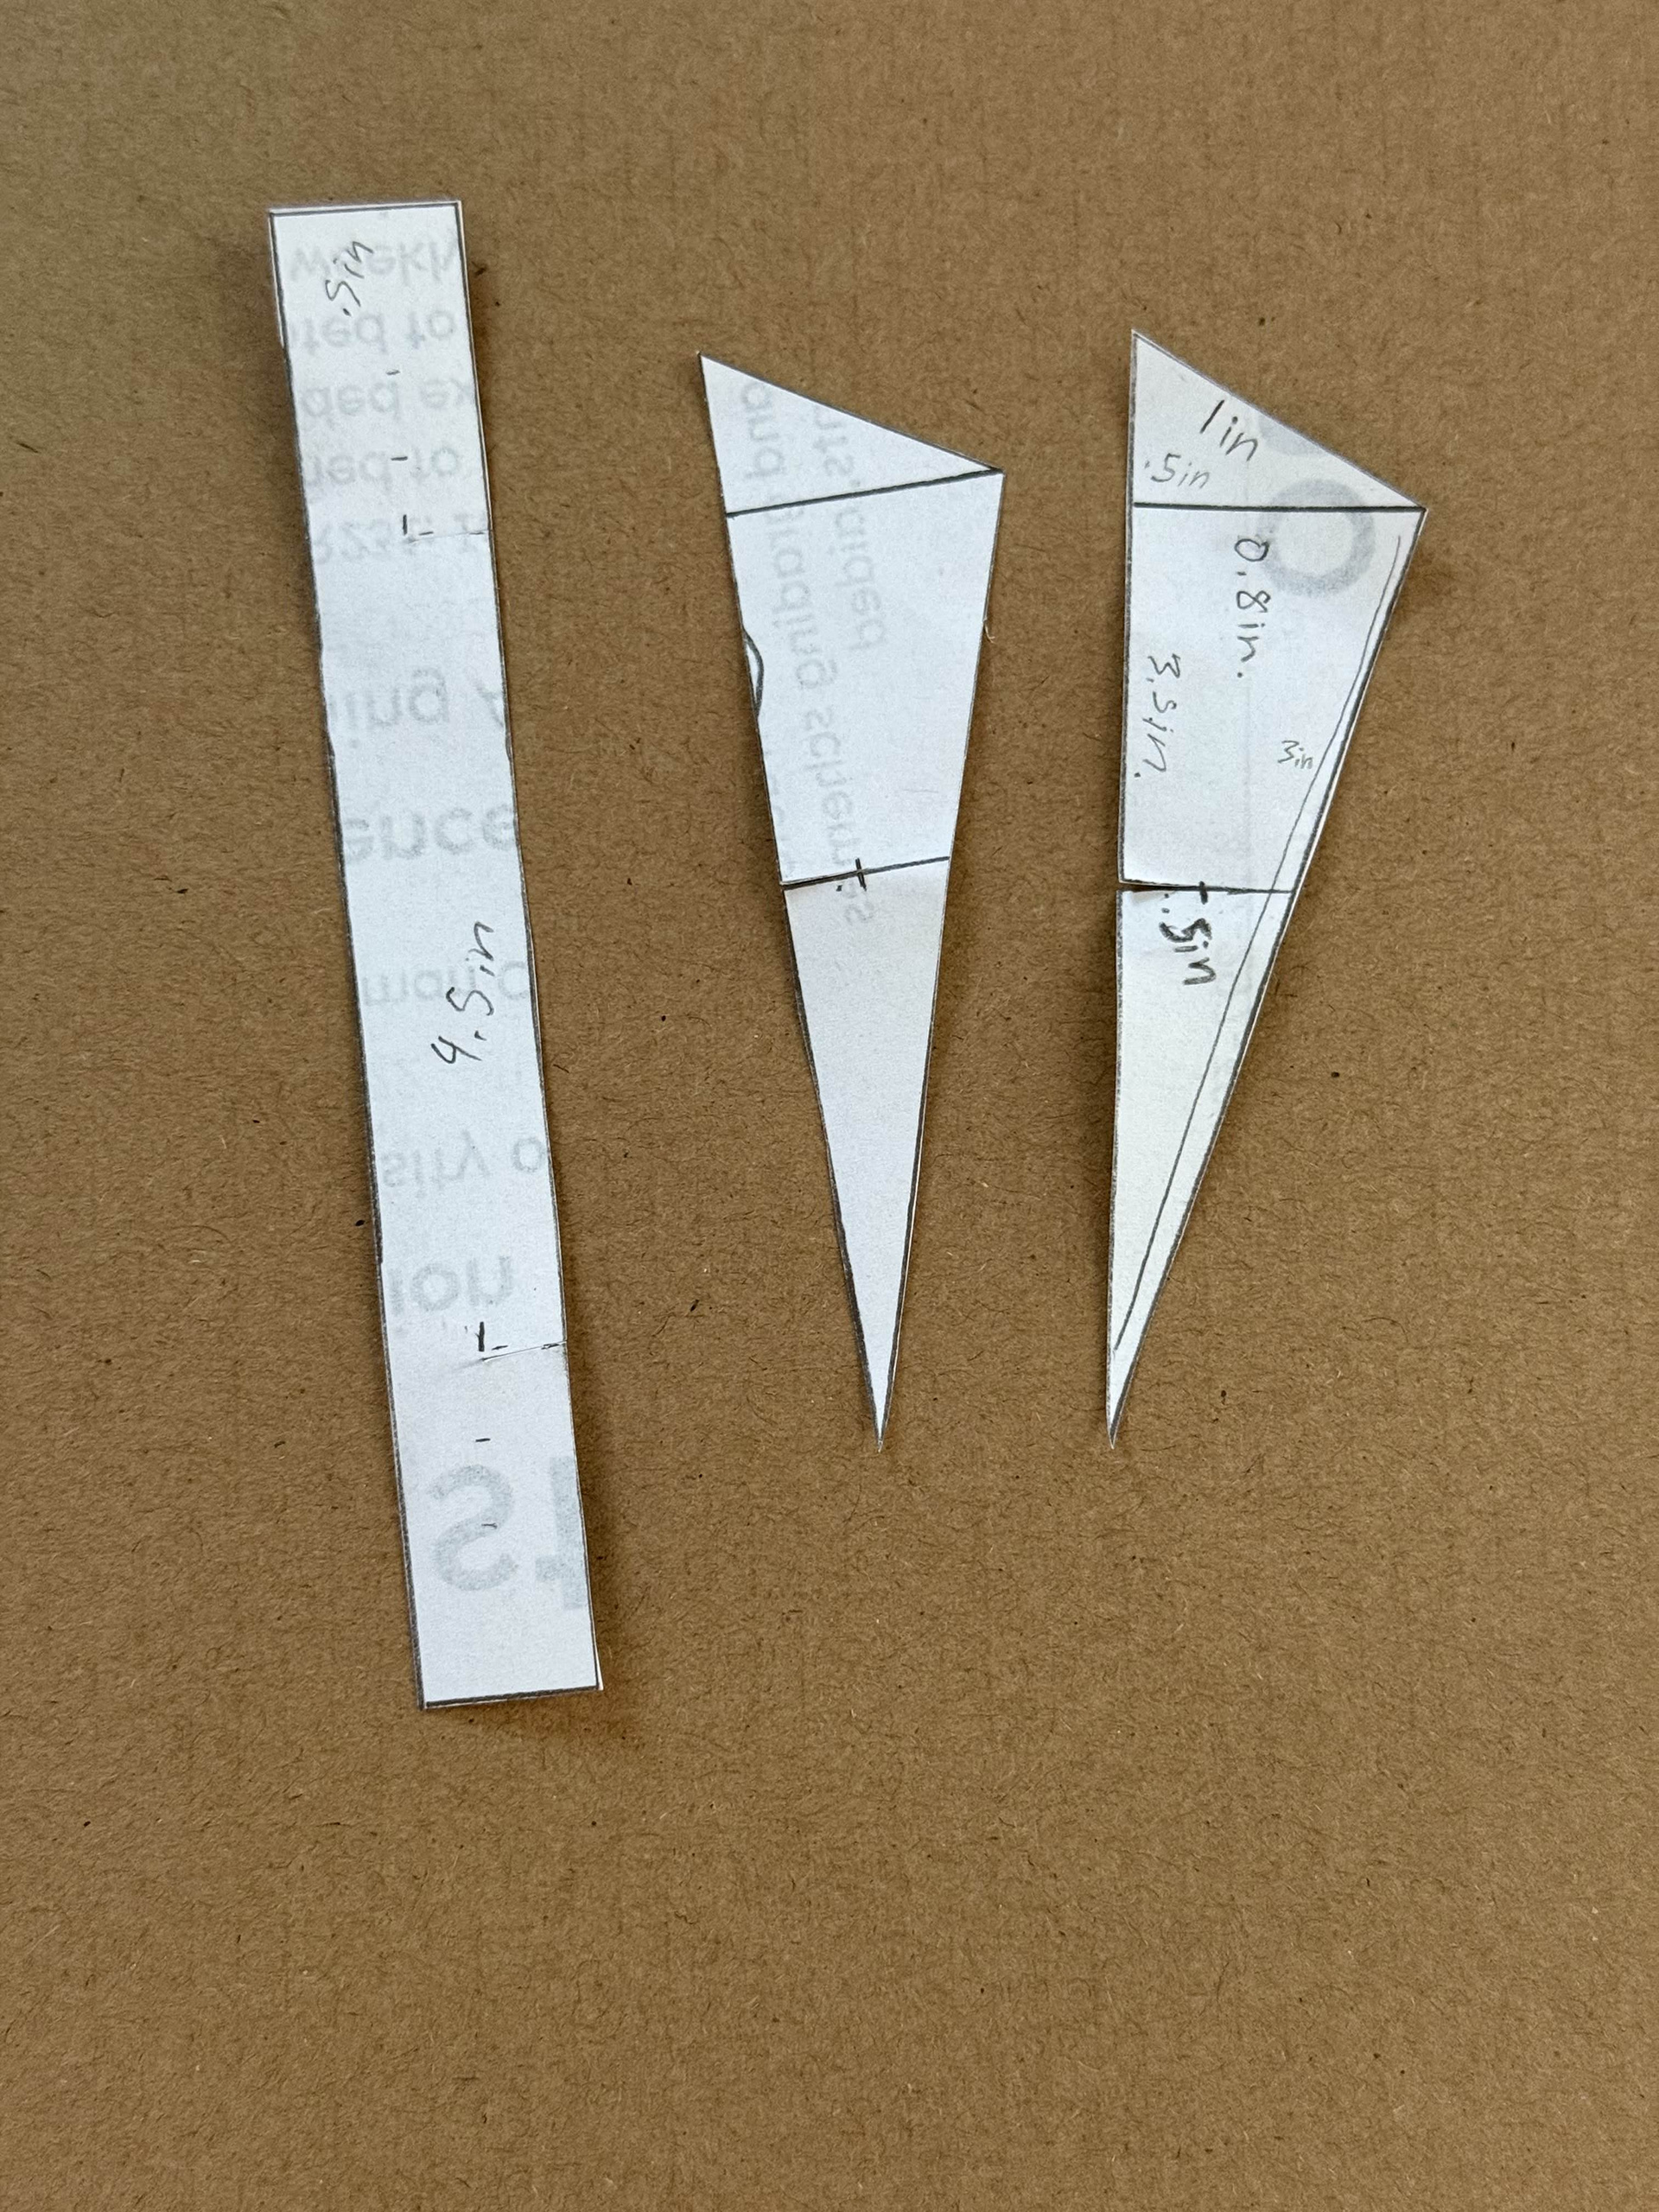
Paper Iteration Cutouts

Paper Iteration
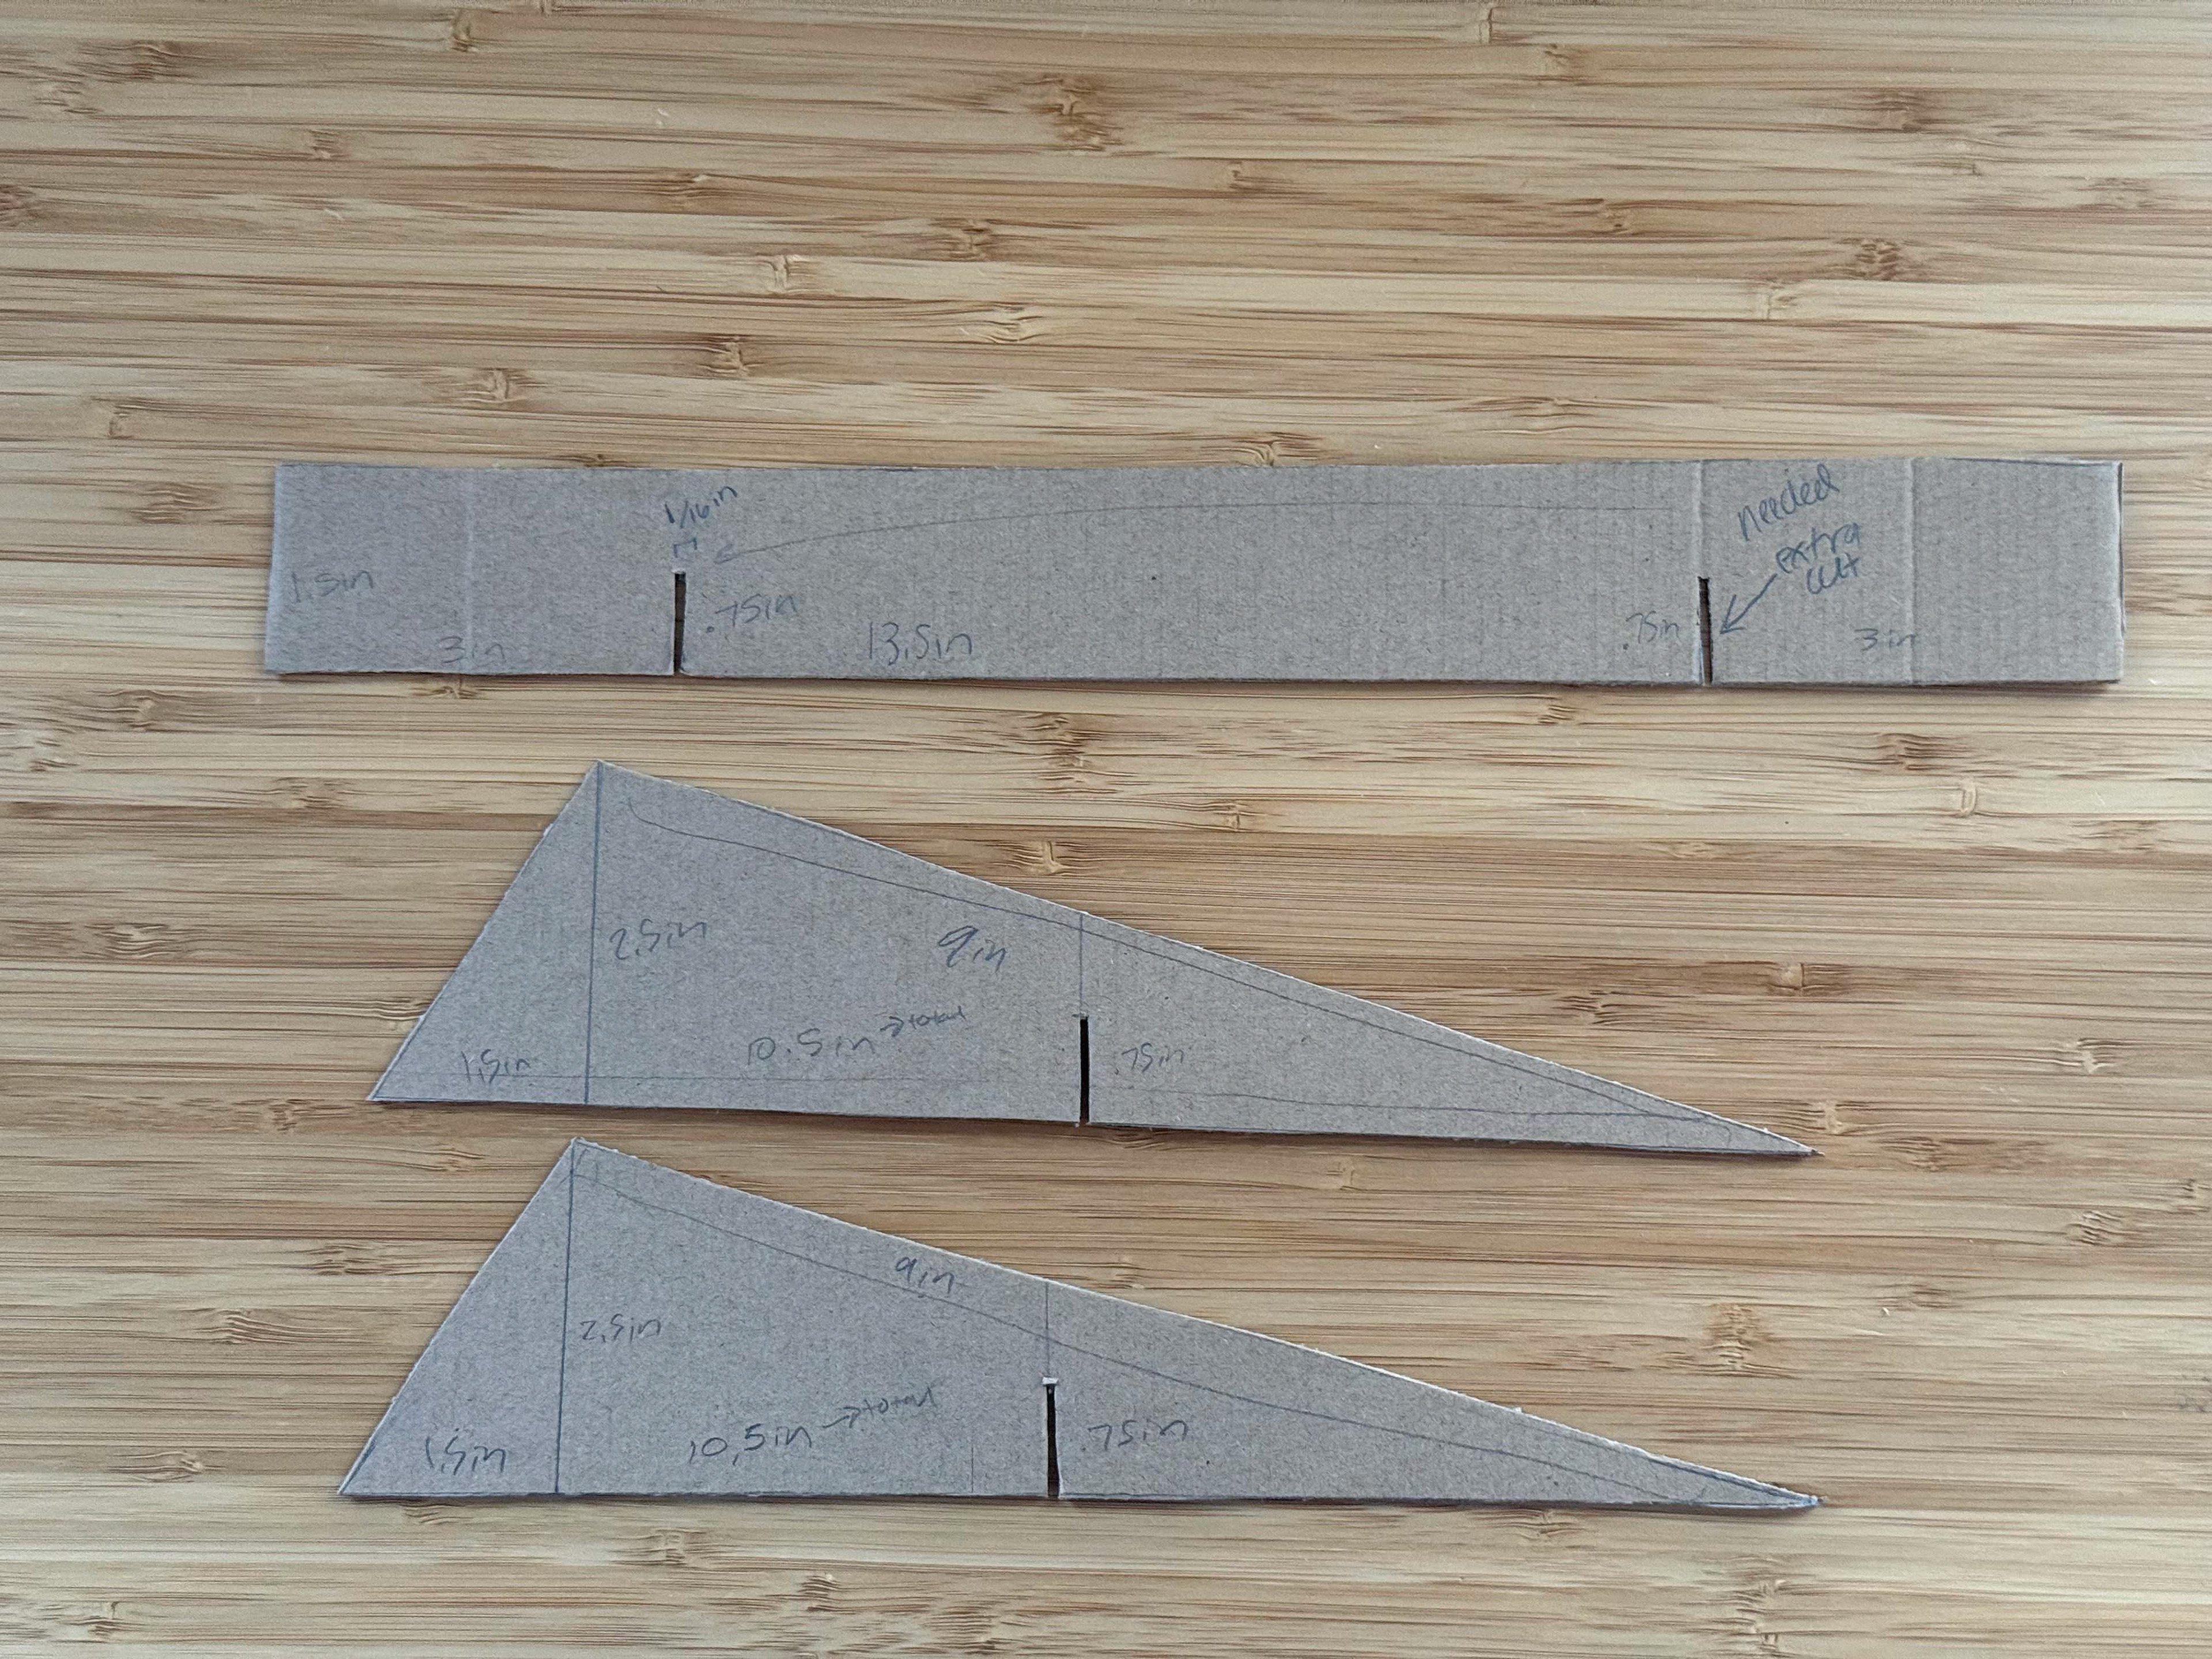
Hand-Cut Iteration Cutouts

Hand-Cut Iteration

First Laser-Cut Iteration that Caught on Fire
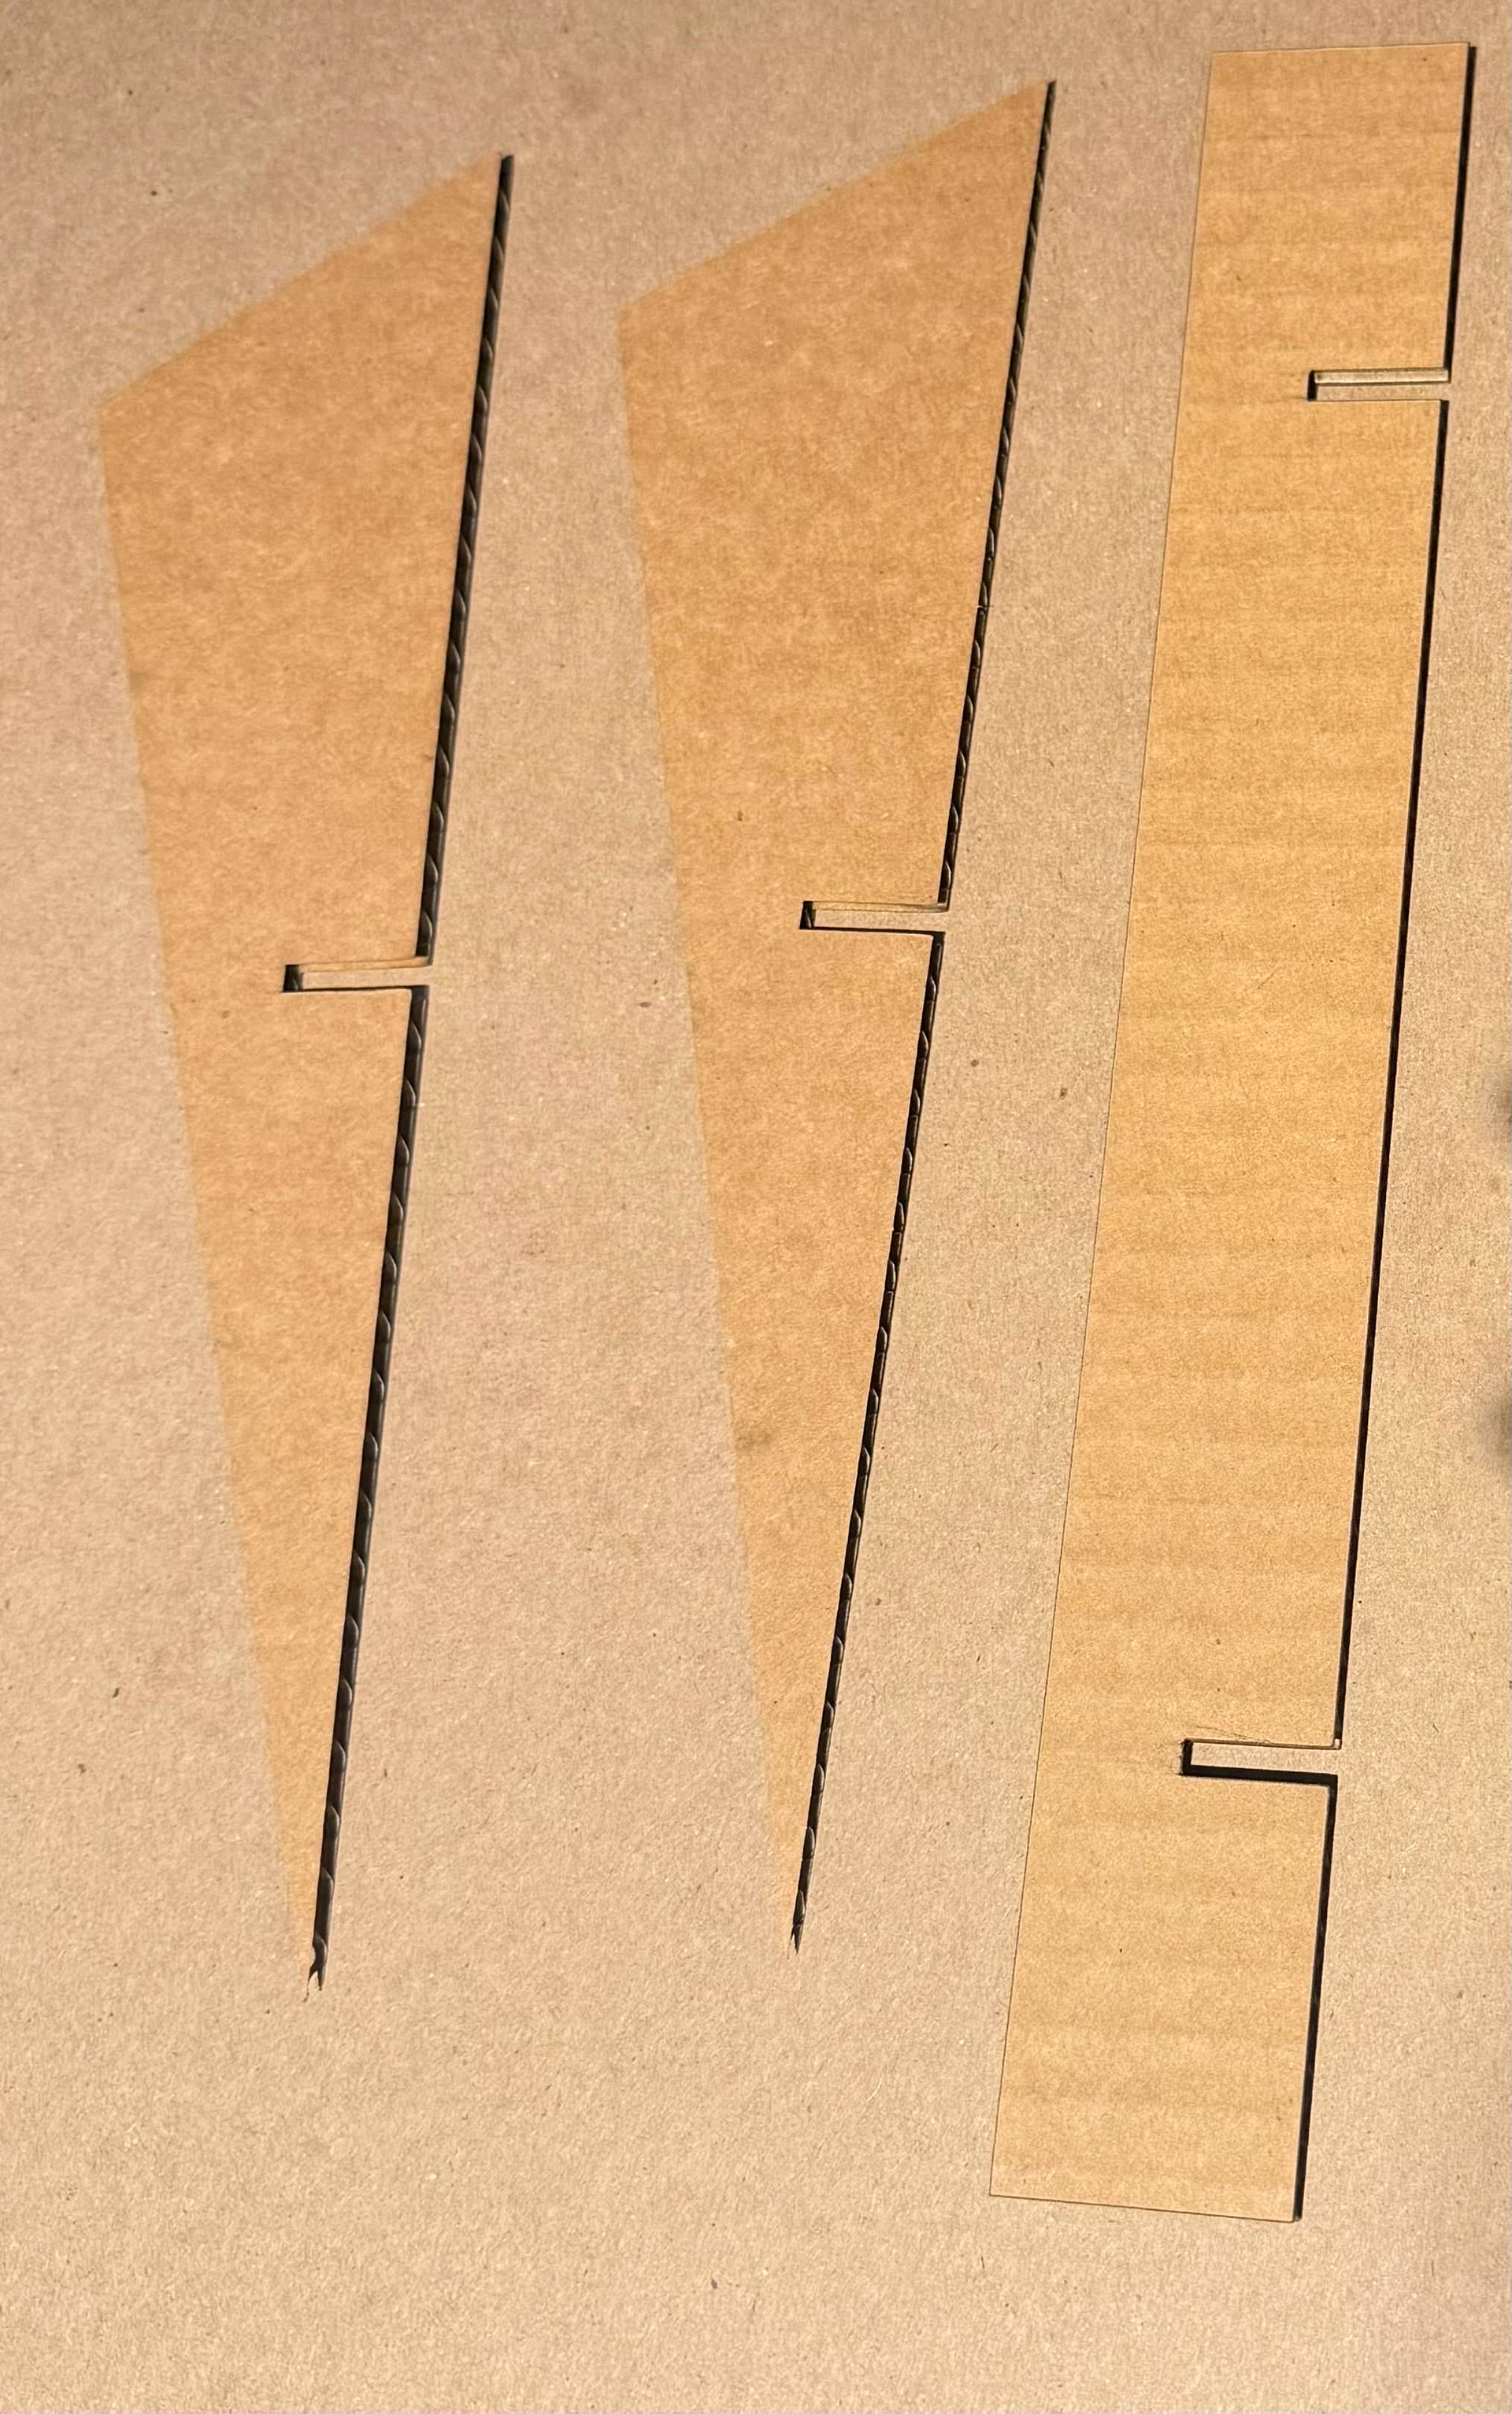
Final Iteration Cutouts

Final Iteration
Analysis
Paper Prototype
I decided to start with a paper prototype that was scaled down because I wanted to test if the three piece design would be successful or not. My goal for this project was to make a laptop stand that was easy to assemble and disassemble for everyone. This meant having the least amount of pieces and having easy assembly process. I wanted a middle bar to help take weight off the identical pieces to help with stability and balance. When putting the paper prototype together, the prototype would keep twisting which was my main concern when moving forward with this design.
Hand-Cut Prototype
With the hand-cut prototype, I scaled up the sizes from the paper prototype so it would be big enough to test with my computer. Once I cut it out and assembled it, it was able to hold the weight of my computer up and was stable/balanced. I also found that the twisting issue found in the paper prototype was no longer an issue since the thickness of the cardboard provided more support. Since that was the main issue I was tackling but was solved with using a thicker material, I decided to move onto the final laser cut iteration.
First Laser-Cut Iteration
When I went to cut the final iteration out, a section of my flute board caught on fire. Not a big flame but burned long enough for me to decide that there had to be a change in the design file. I noticed that I had extra lines in some parts that I used as measurement markers while replicating the design from paper to Adobe Illustrator. I deleted the measurement markers and tried reprinting, which solved the fire problem.
Final Iteration
With the final iteration, I was able to cut out the design with no fire. Although the design was usable and great for my laptop, it was not as usable for those with other types of rubber footing on their laptops. My design failed to consider that other devices might have different rubber footing, like MacBooks, which have circular feet at each corner instead of Dells, which has lines of rubber feet across the width of the laptop. Due to this difference, users who don't have the bar rubber footings on their laptops could not use this design as their laptops would slide off the stand. Another design aspect I failed to consider was clarifying which side is the top and which side is the bottom of the design. During user testing, I found that it was confusing and had it being used upside down, which changed the angle at which the laptop keyboard was at. This may be a pro, so users can choose between 2 different angles their computer could be at but was not an intentional for the design.
Effectiveness of My Design
The design itself was great for my computer since my laptop has rubber lines which stops slipping. However it was not effective for computers that do not have rubber lines across the bottom of the bottom of the laptop. Otherwise, the angle allows my wrists to be at a good angle and reduce pain from using computer. The angle also allows the camera to be at eye level, which makes video calls to be at a more natural view. With all these into account, my goal of having a prototype that is easy to assemble was a success as all the users I asked to assemble the prototype were able to correctly assemble the stand, although some had it upside down.